[Site Name]
[domain_name]
(999) 999-9999
[address1]
[address2]
[City, State Zip]
HR-310 Hard Button Remotes
HADA Smart Home OS has Crestron HR-310 Hard Button Remote support directly built in!
(Crestron HR-310 Hard Button Remote)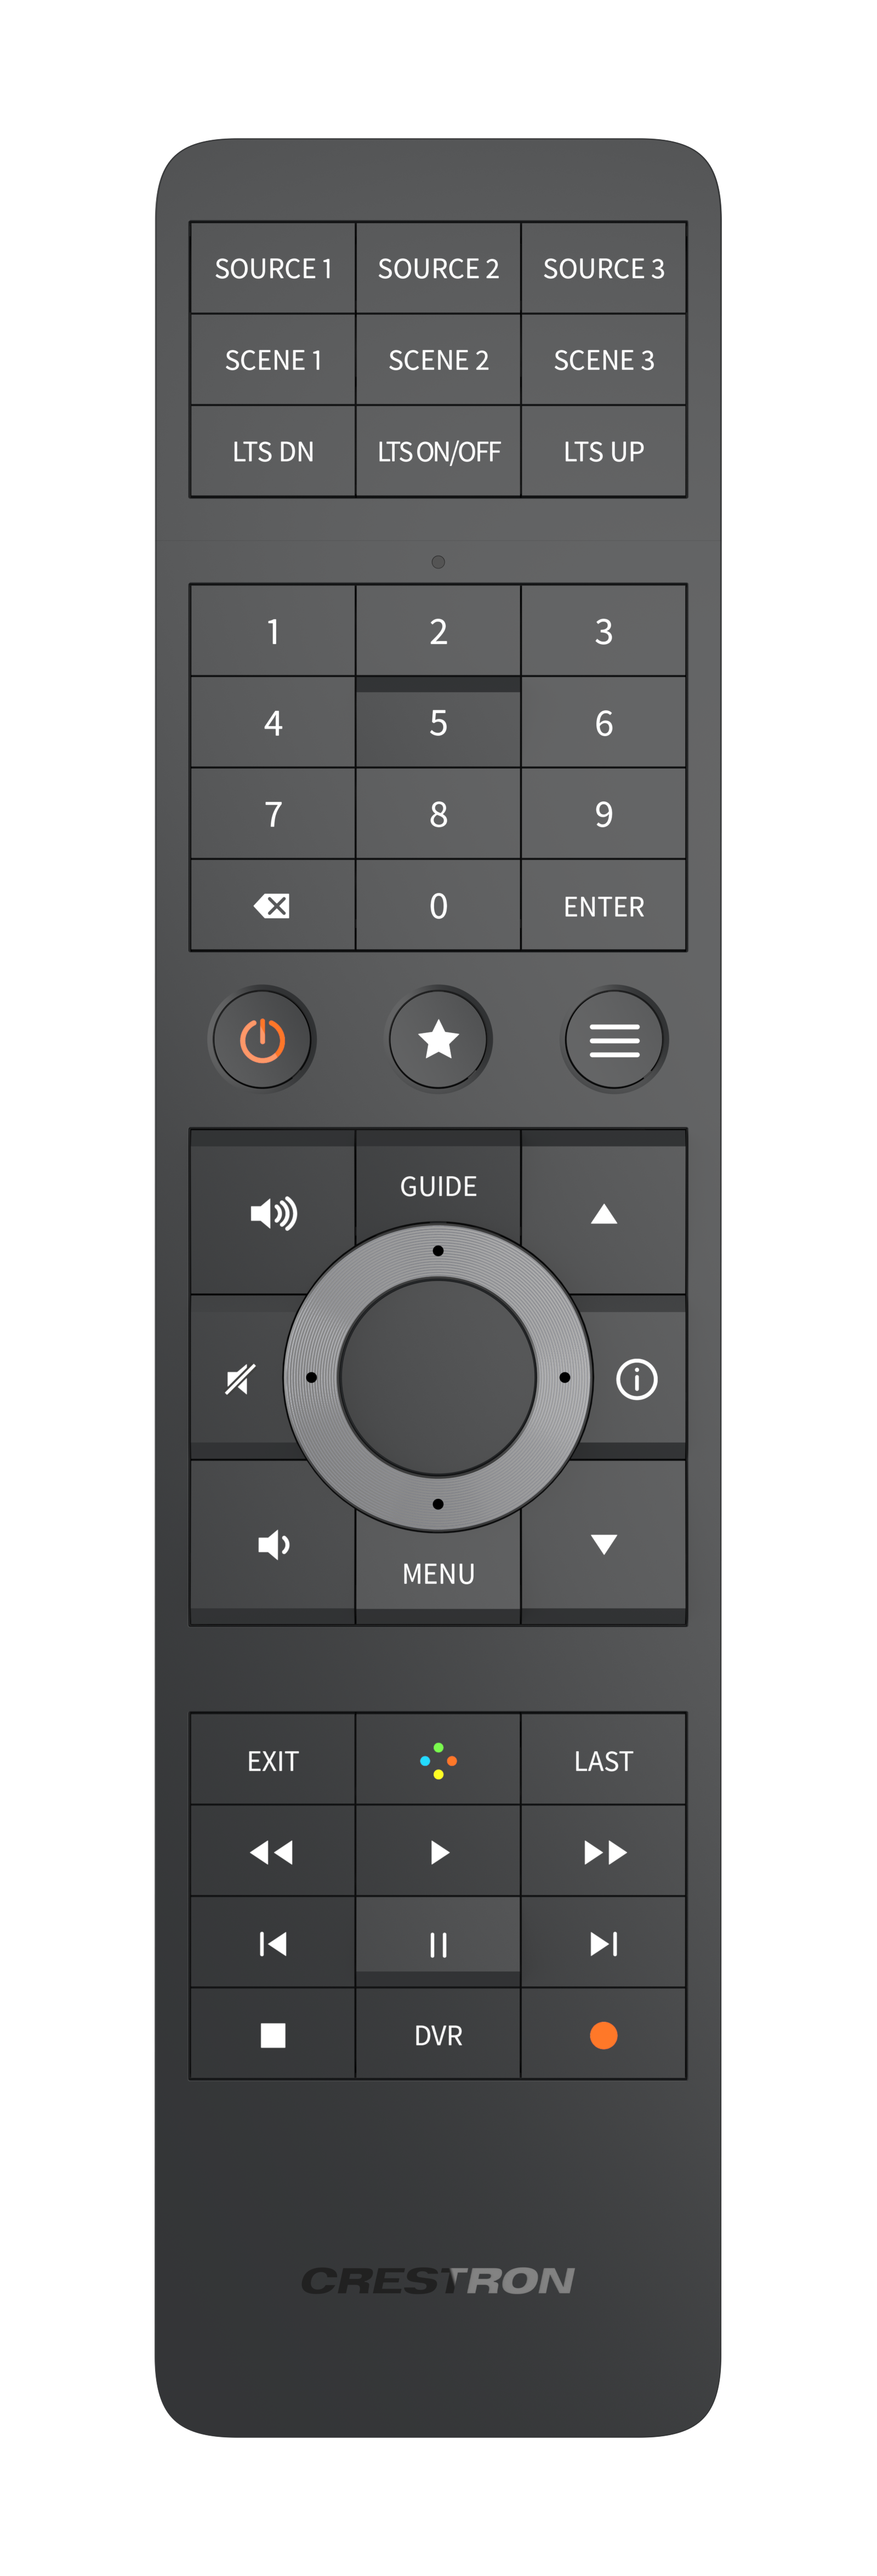
The HR-310 is a reliable and cost effective solution for adding simple to use local room controls. HADA Smart Home OS offers direct integration allowing you to turn the Crestron HR-310 from just a “universal remote” into a powerful, customized, and deeply reliable part of your smart control ecosystem—leading to better user experience, more features, simpler setup, and a professional standard of reliability.
Within the HADA Smart Homs OS Driver Pack, there is a 1 to 1 mapping of the HR-310 buttons to the HADA Smart Home OS interface. This means that you can add a HR-310 to the system in a mater of minutes and use it to control any of the HADA Smart Home OS features available in the driver package.
See the Crestron Website for more information on the HR-310 remote.
Adding HR-310 Remotes to HADA Smart Home OS
The following procedure will walk you though adding an HR-310 remote to your HADA Smart Home OS deployment.
| First | ||
|---|---|---|
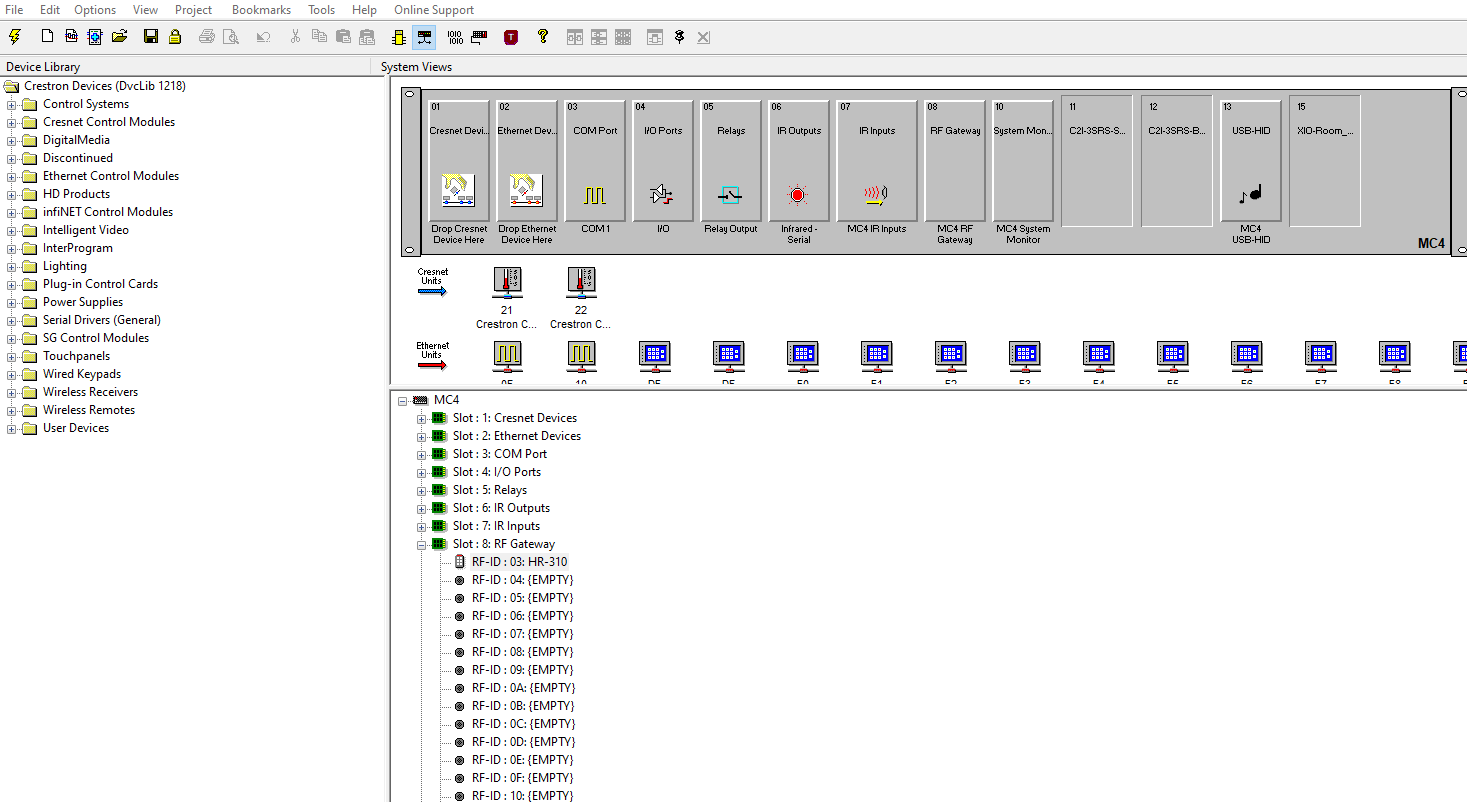
| 1. | Add a driver for the Remote to the control system in your Drivers Package by going to the configure page and add the device to your RF Gateway. In an MC4 the RF gateway is a built in device (as shown in the example images), on systems that do NOT have a RF gateway built in (such as a Pro4) you will need to add the remote to the RF gateway device. Also, make sure you are using the shared version of the RF Gateway driver so that it can be used by multiple program slots. |
|
| 2. | Open Creston Toolbox and then open your Network Device Tree, add the remote to the network using standard Creston RF Gateway procedures making sure to assign the IPID to match the one you assined in step 1. | 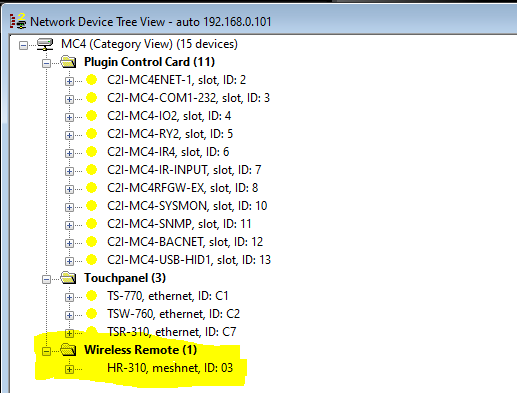 |
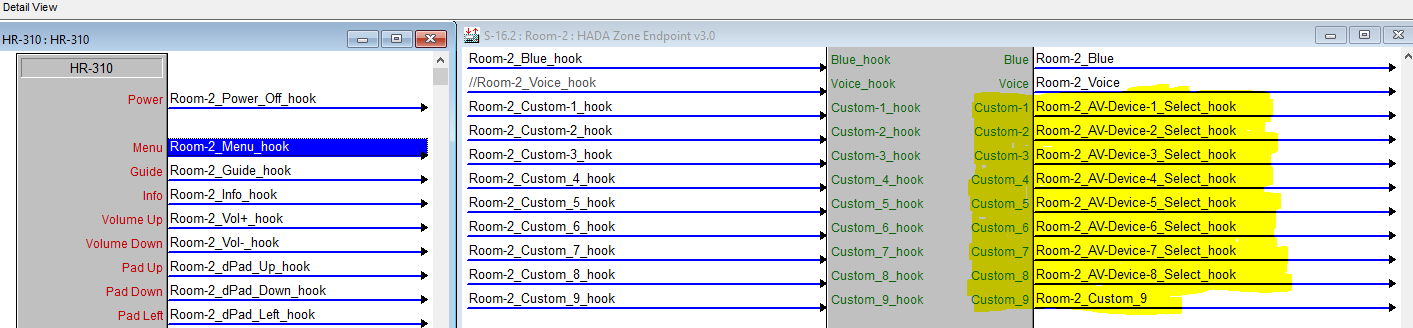
| 3. |
In your Drivers Package, you should now see the symbol for the added remote in your program view, under the RF gateway for your system.
Open the remotes symbol and the HADA Zone Endpoint symbol for the zone/room that you want to add this remote to. you can see in the image the two symbols displayed using the Tile Vertically display option (tip: the tile vertically button will automatically place the last selected symbol on the left). |
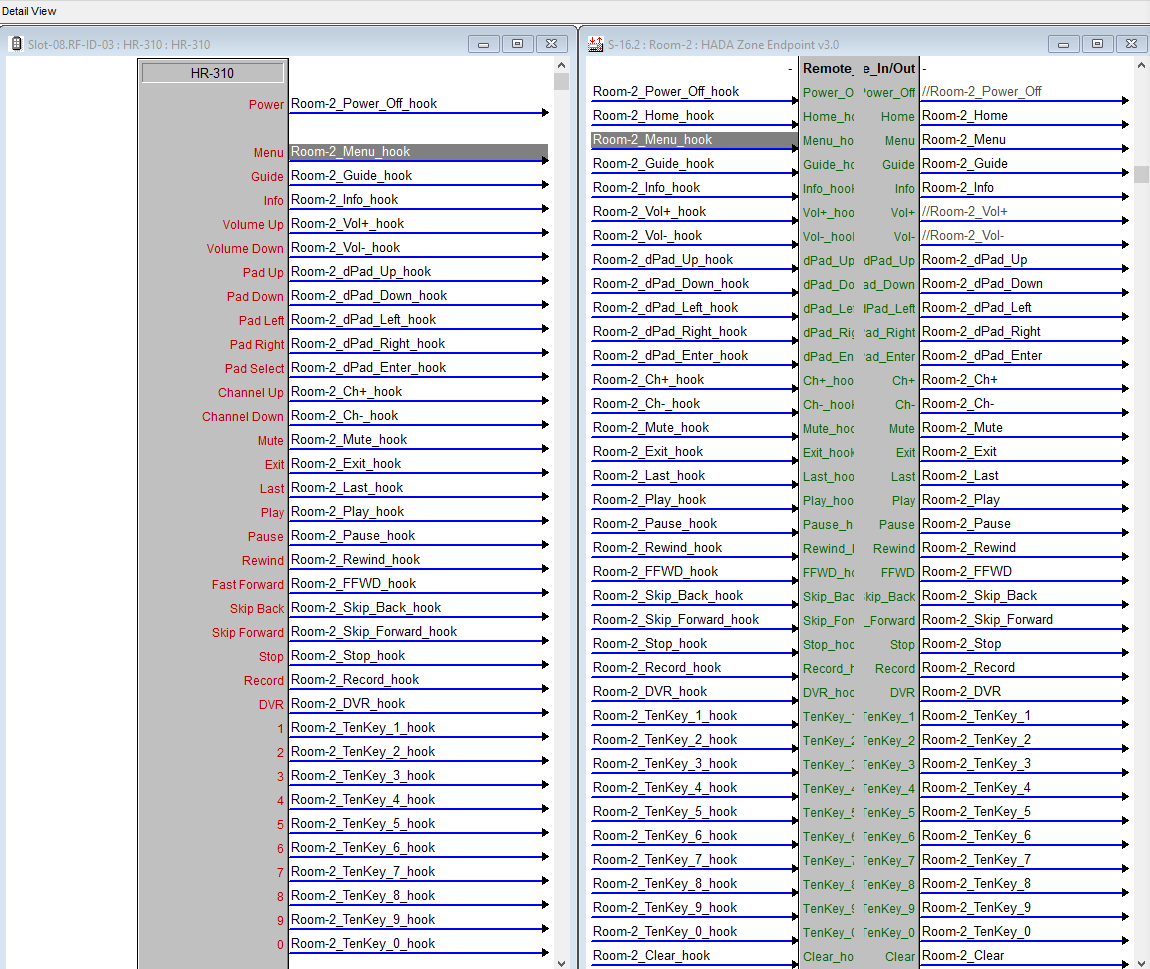 |
| 4. | Link your signals to the endpoint by uncommenting the default signals and dragging the mathing signal to the remote symbol. This will link the remote to the room you have selected. Use the custom 1-9 outputs of the room endpoint to link the related button to some function in your drivers. (shown here the buttons are tied to device selection hooks, but they can go to any function you want to control) Once all signals are linked you simply need to compile and upload your driver package. Once rebooted the remote will be linked to the room and should be ready for use. |
 |